Hey everyone! I decided to write a blog post on the method that works best for me when I decide to depot my eyeshadows. By doing this, I save a lot of room in my make-up collection which is continuously growing. Also, many make-up artists favour using this method especially when they are traveling to see different clients. You can also use a straightener instead of an oven but I prefer this method because I would rather not risk ruining my flat iron which is easier to do with depotting!
Another reason why I wanted to do this post despite there being a lot of other posts based on the exact same topic, is that there are not many step-by-step blog tutorials. They verbally tell you the products you need or there are they are solely written instructions. I believe that pictures tell a bigger story and by breaking it down into 14 easy steps, it would be easier to follow along.
What You Will Need:
- Baking tray
- Wax paper
- Scissors (or anything with a fine sturdy point to lift up the pan)
- Oven
- Eyeshadows
- Z Palette
- Magnets
- Labels
- Pen
- Rubbing Alcohol
- Q-tips (lots!)


Step 2 - Take your baking sheet and cover it FULLY with wax paper. This is to ensure that you will not ruin the sheet and that the wax paper will catch everything. This is an important step, trust me as you will see later on.

Step 3 - Take your eyeshadows you wish to depot and place them face-up on the baking sheet. Make sure that they are open and remove the applicator if there is one.


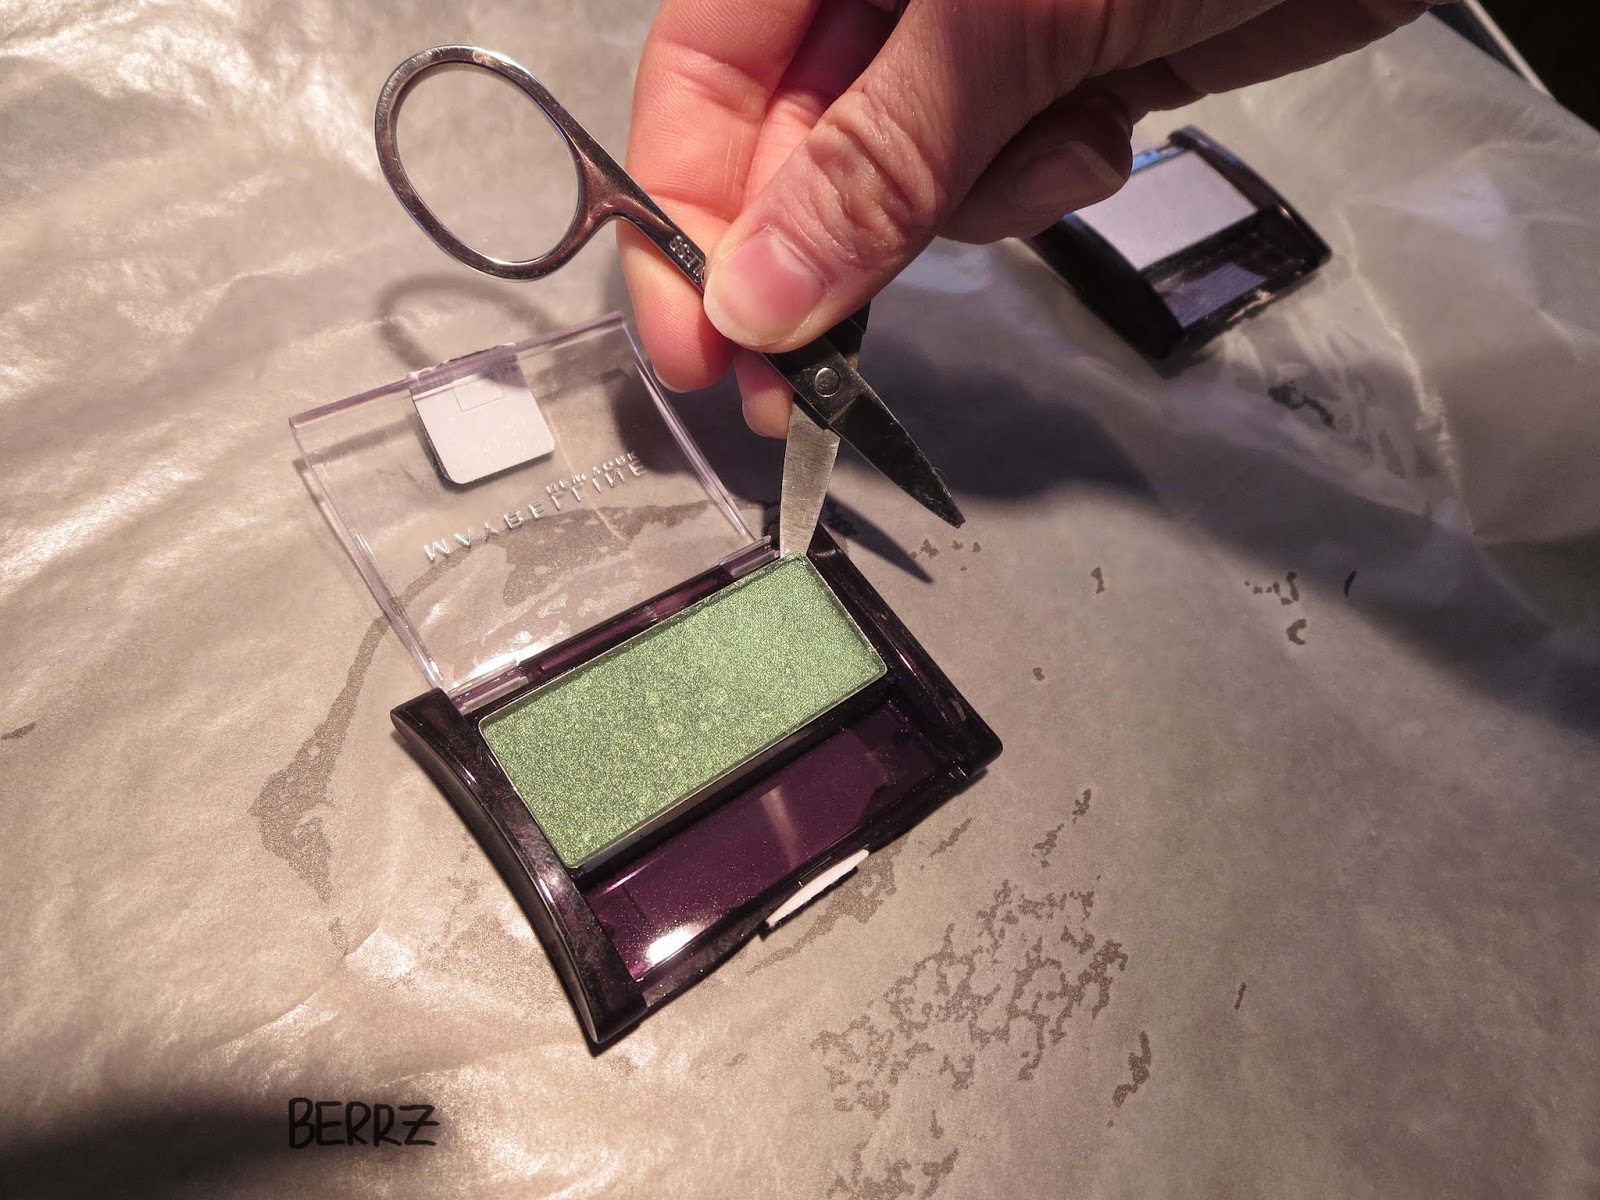
Step 4 - Where the arrow is pointing, the metal container housing the shadow is called 'the pan.' That is what we will be removing. The rest of the packaging will get recycled at a later date.


Step 5 - Make sure to have your Z Palette nearby and it does come with magnets so put those aside because we will be using them shortly. Also, remember which shadow corresponds with which container so that you can write the name of the eyeshadow on the back later on.

Step 6 - Once the oven is done preheating, I put both eyeshadows in the oven (just as I showed in step 3) on the top rack for 1 minute. Do NOT forget about them because they will melt. It is important to keep a close eye on them. Once you take them out WITH AN OVEN MIT, grab your sharp object (I use a pair of old stainless steel scissors,) and pry the pan apart from the plastic container.
* IF YOU ARE YOUNGER, PLEASE GET YOUR PARENT OR GUARDIAN TO DO THIS FOR YOU AS THIS CAN BE POTENTIALLY DANGEROUS!

* IF YOU ARE YOUNGER, PLEASE GET YOUR PARENT OR GUARDIAN TO DO THIS FOR YOU AS THIS CAN BE POTENTIALLY DANGEROUS!
Step 7 - You can clearly see the glue on the back of the pan. That is what we will be removing. Aforementioned, the wax paper has caught all of the mess seen in the photos.

Please Note: Do not discard of the wax paper right away, wait for it to cool completely and then throw it away.

Step 8 - Grab your rubbing alcohol and Q-tips to begin removing the glue.


Step 9 - This is how your pans should look like after you remove ALL of the glue.


Step 10 - Now take your labels, magnets, pen and scissors.


Step 11 - Carefully place your magnet to fit on the back of your pan. Next, peel off the backing off the magnet.

Step 12 - Place your label on top of the magnet and write the name of the shadow on it.

Step 13 - Get ready to start placing your newly depotted eyeshadows into your Z Palette!


Step 14 - It should look something like this. You're all done!

Final Words
Don't worry if you make a mistake the first time, practice makes perfect! And don't toss your empty containers! View the blog post I did for my empties and take your containers to Origins. They have an awesome recycling program!
Until next time,
Berrz <3
No comments:
Post a Comment
Note: Only a member of this blog may post a comment.